Last updated: September 10, 2026
Key Takeaways
- The better choice is to leave 24 to 36 inches of true prep room beside the cook zone.
- Sometimes the answer is not a wall at all; rotating the cook line 90 degrees can clear up the problem.
- For many homeowners, that means a grill, 24 to 48 inches of landing space, a prep counter, closed storage, and lighting.
- Standard outdoor kitchen counters are often around 24 to 30 inches deep, with a finished working height near 36 inches, similar to indoor kitchens.
Planning an outdoor kitchen project — complete guide starts with the site, the utilities, and the local code, not the appliance catalog. That order saves money. This guide to planning an outdoor kitchen project — complete guide shows how to size the space, choose durable materials, and sidestep expensive mistakes. If I had to boil the whole job down to one sentence, it would be this: design the kitchen to fit the site, not the fantasy render. So match the layout to your patio, keep utilities where they can actually run, and pick materials that can take sun, water, grease, and freeze-thaw.
Who this guide is for, and what I’m assuming you already know
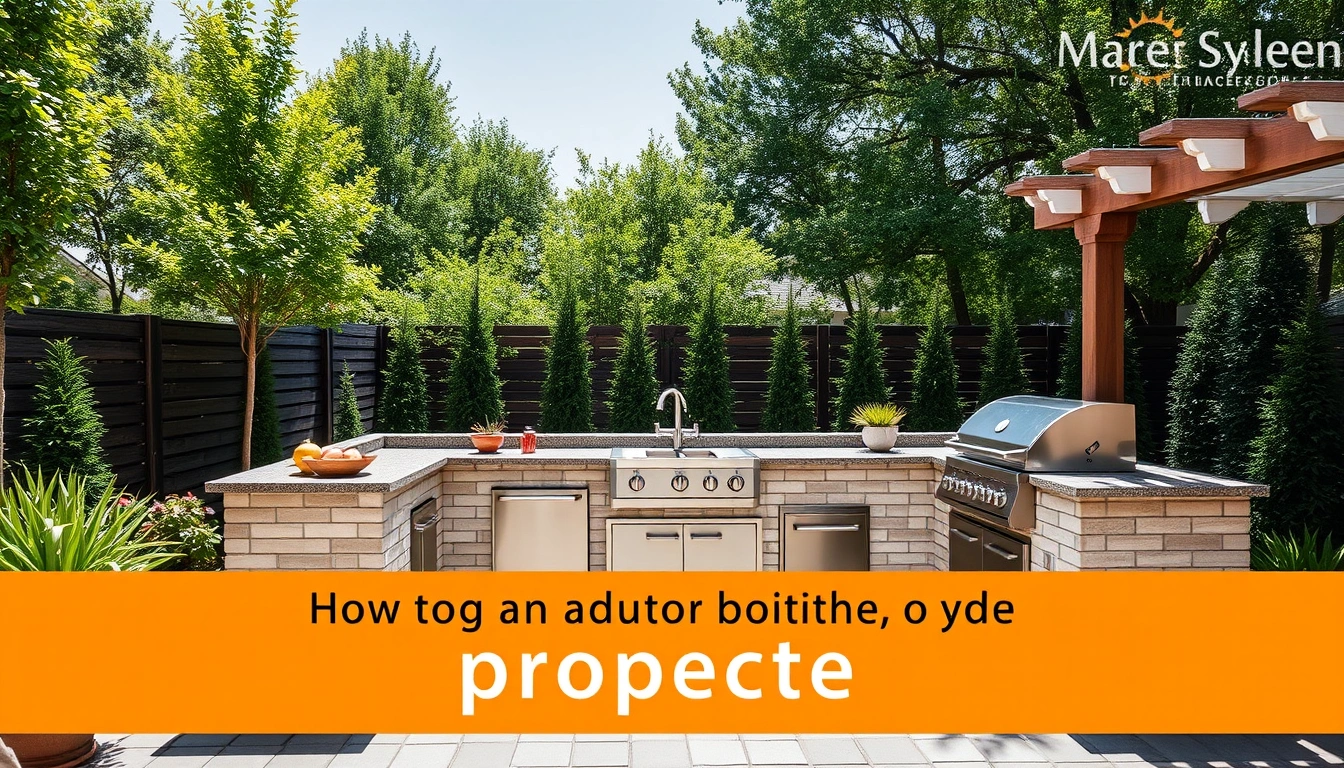
This guide is for a homeowner planning a permanent or semi-permanent outdoor kitchen with a grill, counter space, storage, and at least one utility connection such as gas, electric, or water. I’m assuming you already know the difference between a portable cart grill and a built-in station, and that you have a patio, deck, yard, or terrace where the kitchen might go. I’m also assuming you want something you can live with for years, not a one-season setup with a folding table and a propane bottle.
Not for everybody, though. It is not the right guide if your only goal is to set a portable grill near a door for occasional weekend use. It is also not the right starting point if you want to build on a raised wood deck without understanding load, fire clearance, and ventilation. A deck build can be done, but the structure matters more than the appliance list. Planning gas through a slab, electrical work for a refrigerator or lighting, or any plumbing for a sink? Consult a licensed professional and check local permit rules early; the International Code Council and your local authority having jurisdiction are the right starting points for that.
The biggest mistake is starting with appliances. I would begin with the site. A 10-foot by 12-foot patio, for example, can feel roomy until you place a grill, a 24-inch prep run, a trash pullout, and a 36-inch clearance behind the cook. Then the space shrinks fast. Another early decision is whether you want a true outdoor kitchen or an outdoor cooking zone. The first usually includes hard finishes, fixed utilities, and weatherproof cabinetry. The second may be just a grill island, a small counter, and storage for tools. That split controls cost, complexity, and maintenance more than any catalog does.
Living somewhere cold? I would plan for shutoff valves, drain-down access, and covers from the start. In a fire-prone region, ember resistance and noncombustible surfaces matter more than decorative stone. These are not tiny details. They decide whether the kitchen is pleasant, expensive, or a nuisance by year two. Ugly truth, but true.
What should an outdoor kitchen include?
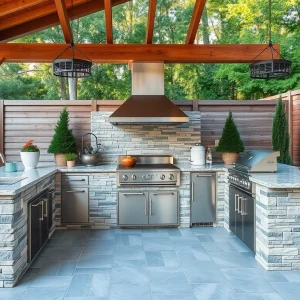
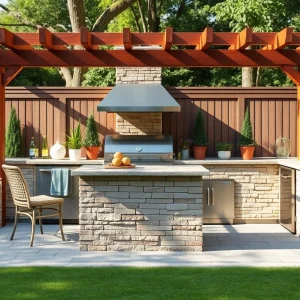
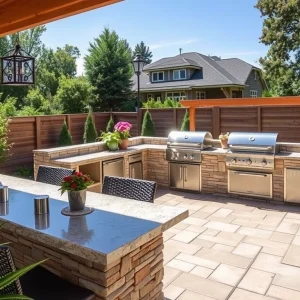
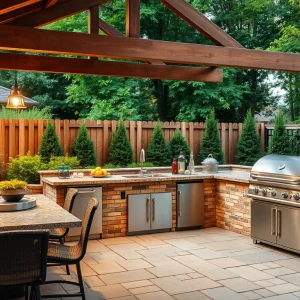
An outdoor kitchen should include only the pieces you will use often enough to justify their footprint, utility demands, and maintenance. For many homeowners, that means a grill, 24 to 48 inches of landing space, a prep counter, closed storage, and lighting. A sink, side burners, refrigeration, and pizza ovens are useful in the right layout, but each one adds cost, service demands, and a fresh failure point.
I like to think about outdoor kitchens in four layers:
- Cooking — grill, smoker, side burner, griddle, or pizza oven.
- Prep — counter space, cutting area, trash, and maybe a sink.
- Support — storage, refrigeration, paper towel, seasonings, and tool hooks.
- Comfort and safety — lighting, shade, wind protection, electrical outlets, and fire-safe clearances.
Usually, the grill becomes the anchor. But not every project needs a giant one. A 32-inch built-in grill may be enough for a family that cooks for six. A 42-inch unit makes sense if you host often or cook several zones at once. The right size is not the biggest that fits; it is the one that leaves at least 12 inches of landing space on one side and ideally 24 inches on the other side for plates and tools. Without that, the cook ends up juggling hot trays over a flame. Messy. Not fun.
Counter depth matters too. Standard outdoor kitchen counters are often around 24 to 30 inches deep, with a finished working height near 36 inches, similar to indoor kitchens. That works well because your body already knows the posture. Go much deeper without a real reason, and the back of the counter turns into dead space. Go too shallow, and the whole thing feels cramped and wet.
Material choice should follow exposure. Powder-coated steel cabinets can do fine under a covered roof but are the wrong pick in a fully exposed yard with salt air. Stainless steel is common, but not all stainless is equal; 304 stainless is typical for many outdoor applications, while 316 stainless handles coastal corrosion better. Stone veneer looks permanent, but veneer over a poorly detailed base can trap water. Concrete board, masonry, and properly sealed exterior-rated cabinetry often make more sense than a purely decorative shell.
My blunt take: a simple, well-sited kitchen with a grill, prep space, storage, and lights beats a crowded island loaded with every appliance under the sun. The extra sink or pizza oven is worth it only if it changes how you cook at least weekly.
How do I plan an outdoor kitchen project step by step?
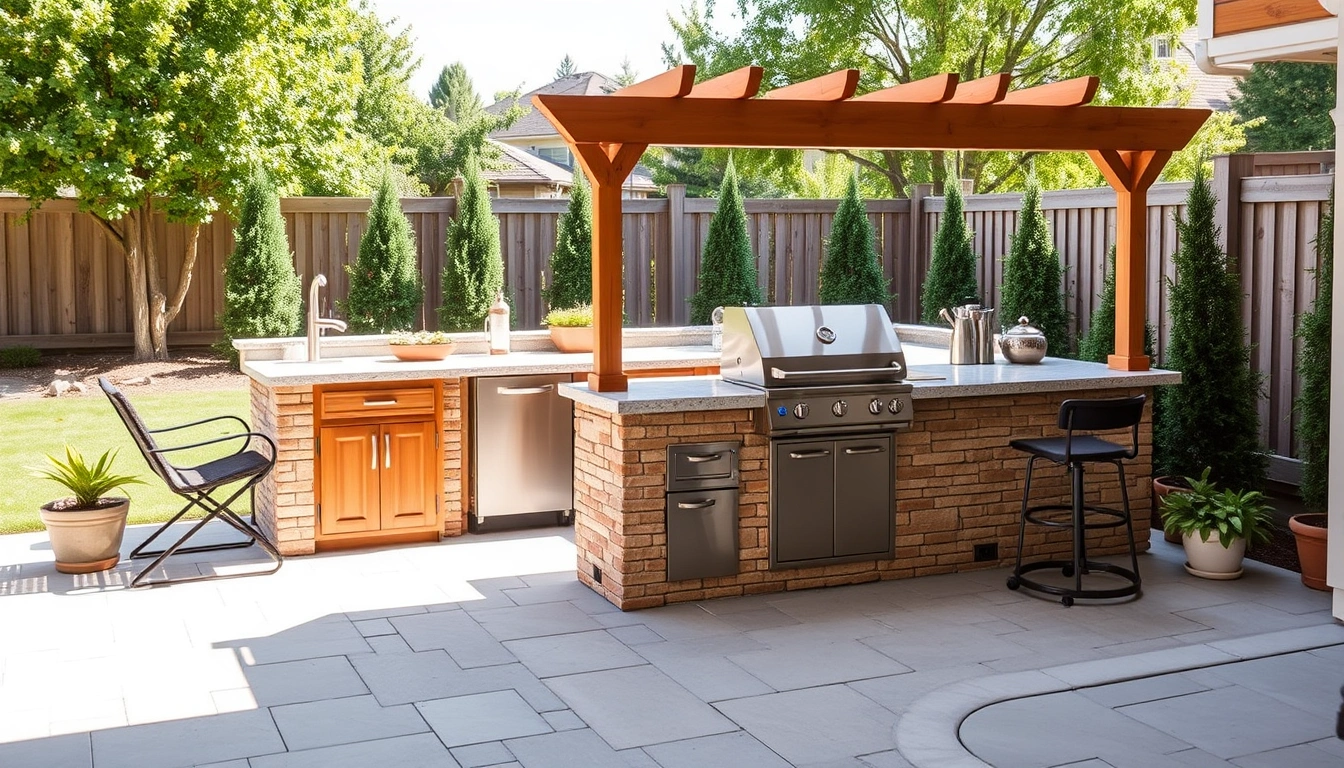
You plan an outdoor kitchen project by sizing the space, mapping utilities, checking code and drainage, and then choosing appliances and finishes that fit the site. The order matters. Reverse it, and you pay for relocations, extensions, and design compromises you can see from across the yard.
- Measure the actual site and mark the footprint. Measure the full area in feet and inches, not just the “available wall.” I would mark the intended kitchen footprint on the ground with tape, chalk, or string before buying anything. Leave at least 36 inches of clear circulation behind the cook line and 48 inches if two people will move through that space at once. Check that doors, windows, fence gates, and grill access do not clash with the layout. A problem shows up when the taped area feels tight before anything is built; that feeling usually gets worse, not better.
- Decide the cooking center and clearances first. Place the grill, smoker, or griddle where smoke, heat, and grease will not blast into seating or under an eave. For built-in gas grills, check the manufacturer’s clearance requirements; many call for specific side and rear setbacks and a noncombustible enclosure. Verify that lids can open fully without hitting a wall or pergola post. A problem appears if the lid opening line lands under a beam or if the cook has to stand sideways to use the knobs.
- Map utility routes before you design cabinetry. Gas, electrical, water, and drainage should be planned as runs, not afterthoughts. Keep gas piping sized for the total load and the run length; long runs or multiple appliances can require larger pipe sizes than a short stub. Electrical circuits for outdoor refrigerators, lighting, and outlets should follow local code and use weather-rated components. Consult a licensed electrician or plumber for any utility routing, because the right sizing and routing depend on the site and the jurisdiction. Verify that access for shutoff valves and service panels remains possible after finishes go in. A problem shows up when the only way to reach a valve is to tear out stone or cabinetry.
- Choose a structure that matches exposure. Use masonry, concrete board, or outdoor-rated cabinet systems, and choose finishes for rain, heat, UV, and freeze-thaw. If the kitchen is fully exposed, specify materials that can shed water and dry quickly. Verify that the base is level within a small tolerance; a countertop that is off level by even a fraction can make doors misalign and water pool. A problem appears when you see standing water, swollen panels, or cracks around joints after the first season.
- Reserve work zones, not just appliance widths. Leave at least 24 inches of prep space near the grill and another landing area for hot pans, platters, or a cutting board. If you want a sink, place it near prep, not at the far end of the run. Verify that there is a clean path from cold storage to prep to cook to serve. A problem shows up if the trash pullout, refrigerator, and grill are all competing for the same 3-foot span.
- Plan drainage and slope before surfaces are finished. Finished hardscape should shed water away from the structure, not toward cabinet bases or doors. Many patios are built with a slight slope for drainage; that slope must be accounted for in the foundation or frame so the finished counter still reads level. Verify that water will not pond at the cabinet base, under appliances, or beside the house. A problem shows up when puddles sit after a 10-minute hose test or after the first heavy rain.
- Spec the ventilation and fire-safety details. If the grill is built into a masonry enclosure or roofed structure, ventilation openings and manufacturer instructions matter. Keep combustibles away from heat sources, and use noncombustible finishes near the cook line where required. Verify that there is enough open air around burners and that any hood, if installed, is sized for the appliance and enclosure. A problem appears when heat builds under a roof, smoke hangs in the seating area, or materials discolor near the firebox.
- Price the whole project, not the shiny part. Include appliances, cabinet boxes, counters, utility trenching, permits, electrical work, gas work, lighting, finishes, and delivery access. A modest outdoor kitchen can look affordable until utility routing and hardscape repair are added. Verify that you can still meet your budget after contingency. I would hold back 10% to 15% for surprises like rock, root conflicts, hidden slab issues, or upgraded utility parts. A problem shows up when the appliance quote fits but the site work does not.
For a clean sequence, use this order: site, utility, structure, appliances, then finishes. It is not glamorous. Still, it prevents the most expensive errors. For planning an outdoor kitchen project — complete guide, that sequence is the one that keeps the budget and schedule realistic.
What do I need to check before I buy anything?
Check the site, the code path, the utility capacity, and the weather exposure before you buy appliances or cabinetry. That sounds cautious because it is. Outdoor kitchens are expensive precisely because they are part structure, part mechanical project, and part furniture.
Start with the property itself. Measure setbacks from property lines, fences, overhangs, and windows. A grill placed under a low roof or too close to a vinyl wall creates obvious heat and smoke problems. If your municipality has rules for outdoor cooking appliances, setbacks, or impervious surfaces, check those before you finalize a plan. For gas, confirm whether a permit is needed for the line extension and whether the gas meter can support the added load. For electric, ask whether the circuit panel has room for dedicated outdoor circuits. For plumbing, think about winterization and drain access if a sink is part of the design.
Then inspect the ground. Soil that stays wet, a patio that heaves in winter, or a slab with cracks will affect the build. A site that slopes hard away from the house may need a different base than a flat patio. If there is any chance of frost heave where you live, foundation design matters. A kitchen built on a weak or settling base will telegraph that movement into doors, grout lines, and countertops.
Shade and wind deserve more attention than most renderings give them. A breezy site can make a grill unpleasant to use and can blow heat, grease, or ash toward guests. A hot, uncovered site can make stone and metal uncomfortable to touch. If the kitchen will sit in full sun, I would plan for a pergola, roof extension, or other shade solution early, because it changes both the load and the clearances.
I also check maintenance access. Can the refrigerator be serviced without moving the whole island? Can the shutoff valve be reached? Can you pull the grill for cleaning? A kitchen that looks good only when nobody needs to repair it is a bad kitchen.
One practical test helps: if you had to leave one appliance out for 30 days, which one would you miss least? The answer tells you where the project can be simplified. Many people find that the sink or secondary burner is less essential than they thought, while prep space matters more than they expected.
What are the mistakes people actually make?
Layout mistakes hurt more than appliance mistakes. A great grill in a poor arrangement still makes a frustrating kitchen. I would rather see a modest setup that works than a lavish one that fights the cook every time.
-
Buying appliances before the plan is set. This causes cabinet depths, utility connections, and venting to become whatever the appliance demands. The consequence is dead space, awkward gaps, or forced relocations. The better alternative is to fix the footprint and workflow first, then choose appliance dimensions to fit the plan.
-
Ignoring prep space. People often give the grill 36 inches of width and leave only a tiny sliver for plates, knives, and cutting boards. The consequence is constant back-and-forth to an indoor kitchen. The better alternative is to leave 24 to 36 inches of real prep area near the cook zone.
-
Underplanning storage. Open shelves look good in drawings but collect dust, pollen, and water. The consequence is clutter on the counter and tools living indoors. The better alternative is closed, weather-resistant storage for tools, fuel, towels, and serving pieces.
-
Placing the grill where smoke and heat annoy everyone. This is common under pergolas, near seating, or beside doorways. The consequence is an unusable social space. The better alternative is to think about wind direction, roof edges, and prevailing movement through the yard.
-
Skipping drainage detail. Water near cabinet bases, outlets, or appliance doors is a long-term problem. The consequence is corrosion, swelling, staining, and service calls. The better alternative is to detail the slope, drip edges, and base materials before finishes go on.
-
Overbuilding the menu. A pizza oven, side burner, beverage center, sink, refrigerator, warming drawer, and smoker all in one run sounds luxurious. The consequence is high cost, high maintenance, and a layout that is too crowded for day-to-day use. The better alternative is to choose one main cooking method and build the rest around that.
The trade-off is simple: every feature has a footprint, a utility demand, and a maintenance burden. If a feature does not change how you cook at least a few times a month, it may not deserve space in the design.
When should I stop and change the plan?
Stop and change the plan when the site, structure, or utility demands make the kitchen unsafe, impractical, or too expensive to maintain. This is the section people skip, and it is where bad projects are saved.
The grill must sit under a low roof or tight pergola: heat and smoke clearance become a real issue — move the grill or redesign the cover so the appliance manufacturer’s clearances can be met.
The gas run is long, undersized, or hard to access: performance and serviceability can suffer — rework the gas plan before finishes go in, and do not bury a line that cannot be inspected or reached.
The slab or patio is cracking, heaving, or holding water: the base will not support a durable kitchen — repair or rebuild the foundation before adding cabinets and stone.
The project depends on a sink in freezing weather: winterization becomes part of daily life — either design full drain-down and shutoff access or omit the sink and keep water inside the house.
The kitchen would crowd a doorway, path, or seating area: the layout is wrong, even if the render looks polished — shrink the system and protect circulation rather than forcing the fit.
The budget only works if utilities are skipped: the plan is incomplete — either simplify to a grill-and-counter setup or reset the budget for the full build, including trenching, permits, and finish work.
That last point matters most. An outdoor kitchen that depends on “later” for gas, electric, or drainage is usually not a kitchen yet. It is a very expensive staging area. I would rather see someone build a smaller, fully finished setup than a larger shell that stalls for a year.
What if my space is small, covered, coastal, or in a cold climate?
Change the standard plan when climate or footprint alters the rules. Outdoor kitchens fail most often when a one-size-fits-all design ignores the site, and planning an outdoor kitchen project — complete guide means adapting the build to the conditions rather than forcing a template.
For small spaces, reduce appliance count and protect circulation. A 6-foot run can work if it holds a grill, 24 inches of prep, and one storage bay, but it will not behave like a full entertaining island. I would prioritize landing space and a compact grill over extras. On a balcony or tiny terrace, check building rules, load limits, and fire restrictions before assuming anything is allowed. A compact electric grill or a smaller gas unit may be more realistic than a full built-in gas station.
For covered spaces, ventilation becomes the central issue. A roof helps with rain and sun, but it can trap smoke and heat if the layout is wrong. Use manufacturer clearance requirements and do not assume a hood is optional just because a roof exists. If the structure is attached to the home, I would be extra careful with fire-safe materials near the cook line. The right question is not, “Can I cover it?” but “Can I cook here without filling the space with smoke?”
For coastal sites, corrosion resistance matters more than appearance alone. Salt air is unforgiving. I would favor higher-grade stainless, powder-coated components rated for marine exposure, and hardware that can be replaced without tearing apart the whole cabinet. Cheap fasteners are a false economy here. The wrong choice often looks fine for a season and then pits, stains, or binds.
For cold climates, winterization and freeze-thaw resistance are the first things to get right.