Last updated: September 10, 2026
Key Takeaways
- More is better; 36 inches feels generous in a small outdoor kitchen.
- Aim for 24 to 36 inches of counter between sink and grill if the layout allows.
- Verify that the door opens at least 90 degrees without hitting a handle, post, or adjacent cabinet.
- Reserve a clear prep zone of at least 24 inches.
A patio kitchen works best when the grill, sink, fridge, and storage stop competing with one another. Put the hot zone where smoke won’t chase people away, keep cleanup close to prep, shade the fridge, and keep storage inside the work area—not out on the far side of the deck. I’m thinking of a real setup here, not a fantasy render. Usually, that means a straight run of 8 to 12 feet, or an L-shape with at least one 4-foot leg.
What layout works best for an outdoor kitchen?
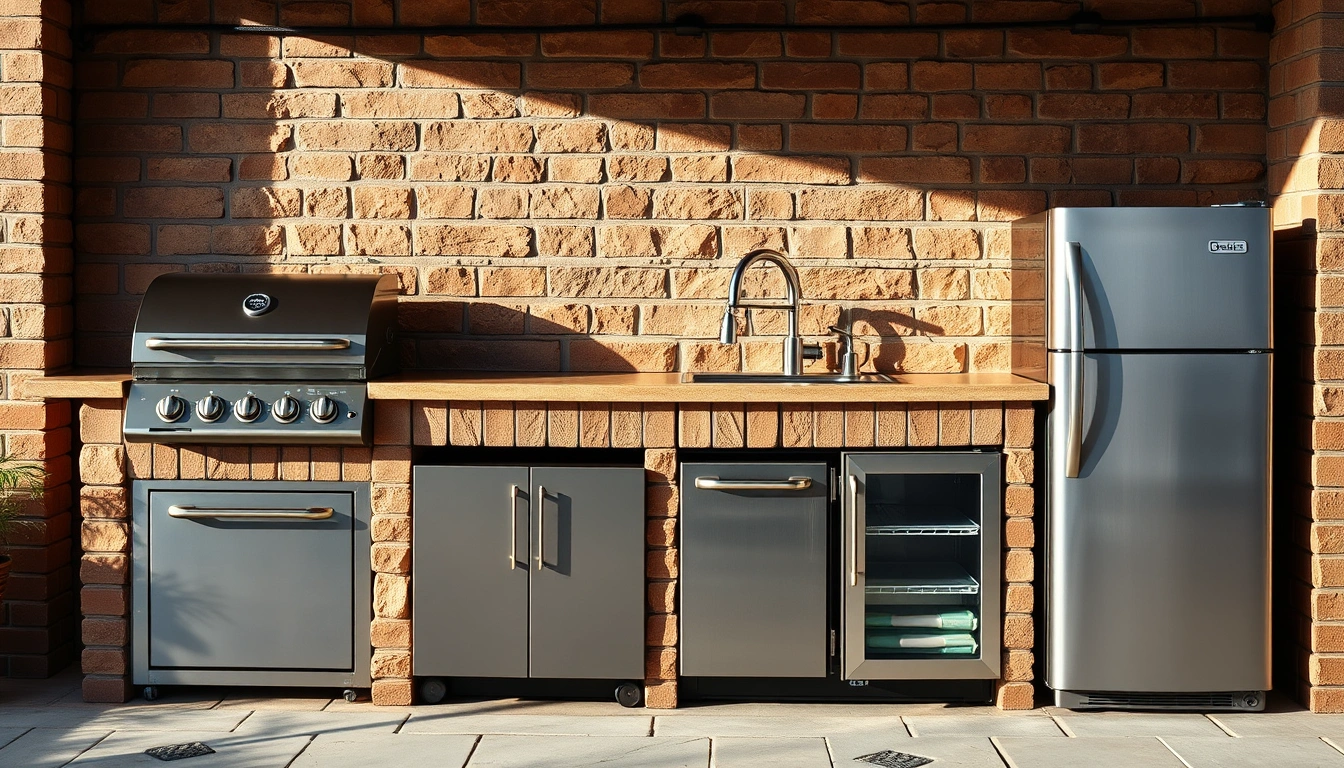
Compact. That’s the honest answer.
A workable setup usually keeps the cook moving in a tight triangle: grill, sink, and fridge should sit within a few steps, with storage tucked under the prep and landing spots. I’d start with the work pattern, not the appliances themselves. Where does food enter? Where do dirty dishes exit? And where will grill smoke go on a typical 10- to 15-foot patio? Start with the dimensions, and the whole thing can go sideways fast if you’re not careful. If you do that, you often end up forcing the plan around a run that is too long or a fridge that swings into a wall.
A practical rule: make the grill the anchor, then put the sink 24 to 48 inches away on one side and the fridge 24 to 36 inches away on the other if the cabinet width allows it. Check the appliance manuals and, where needed, consult a kitchen or outdoor-living professional before finalizing spacing. That gap gives you a landing zone—a clear counter where raw food, platters, or a hot pan can wait. I would not place the sink right next to the grill. Steam, splash, and grease are a messy mix, and a sink too close to the burner line makes the whole area feel pinched.
Symmetry is the trap. It looks neat on paper. But if the trash pull-out sits three steps from the prep board and the fridge door blocks the only open path, the kitchen will annoy you every single time you use it. A better plan reduces backtracking and keeps two people from bumping elbows. If two people will cook together, plan for at least 36 inches of aisle space behind the main run, and more if a bar counter faces the cook area.
How do I place the grill, sink, fridge, and storage in the right order?
Think in tasks, not in a shopping list.
The usual order is prep, grill, landing, sink, then storage beneath the counter that gets used most. The grill needs a noncombustible surround and a clear landing area on at least one side; the sink needs enough counter for a dish rack, soap, or a cutting board cover; the fridge needs shade and a door swing that doesn’t block traffic. Storage belongs where you can reach it without crossing the cooking path. Simple enough? In practice, that’s where many plans start wobbling.
How do I place the grill, sink, fridge, and storage in the right order?
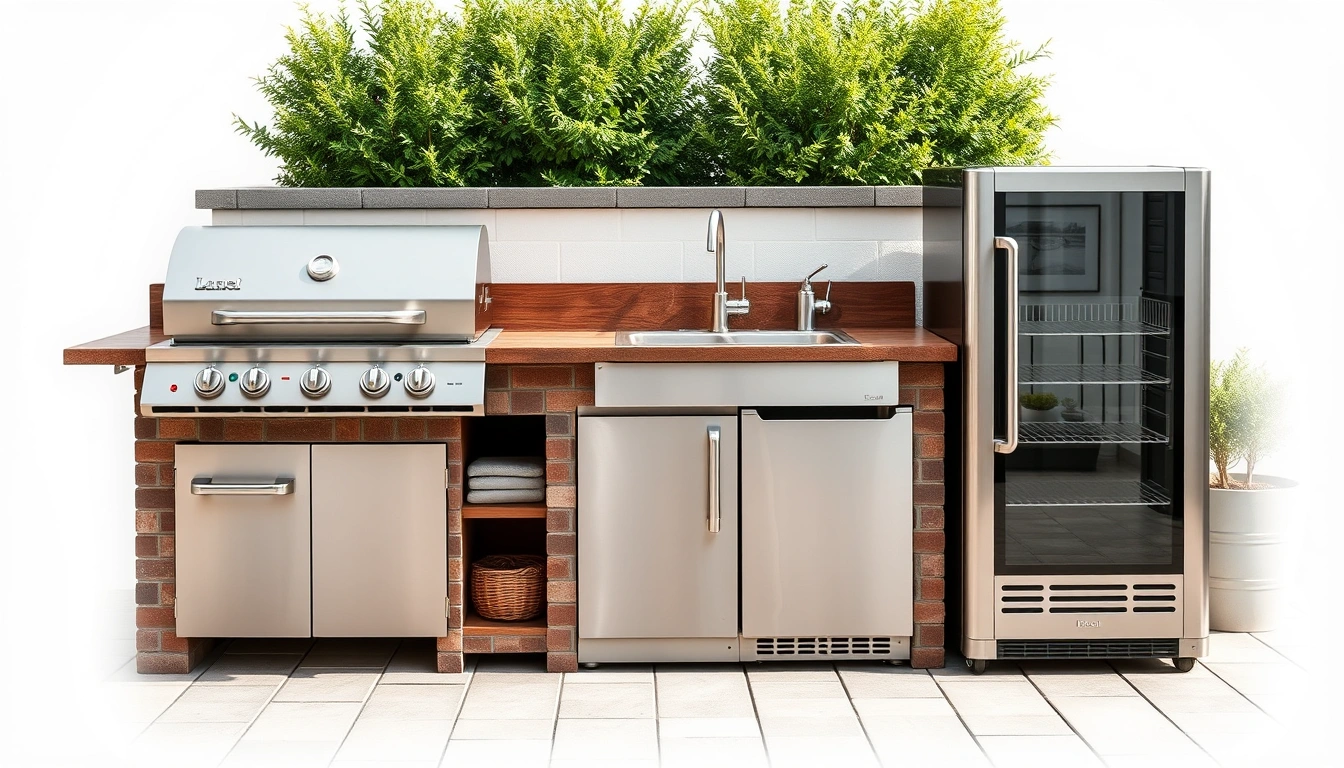
Draw the appliance cutout widths and the required clearances on a plan at 1/4-inch scale first. Then mark the main cook line on the patio. Place the grill before anything else, because it sets the heat, venting, and clearance rules. Most built-in grills need side and rear clearances that vary by model, so the manufacturer’s manual matters more than any generic sketch. Verify that the lid can open fully without striking a wall, pergola post, or upper shelf. If the lid hits anything, the grill is simply in the wrong spot. No mystery there.
- Mark the grill zone at the edge of the main run. Leave at least 24 inches of landing counter on one side and, if possible, 12 to 18 inches on the other. Verify that the cook can turn sideways without stepping into the aisle. A problem is any arrangement where the grill is boxed in by two counters with less than 18 inches of usable landing on both sides.
- Place the sink within one step of the prep surface. Aim for 24 to 36 inches of counter between sink and grill if the layout allows. Verify that a plate, tray, or cutting board can sit beside the sink. A problem is a sink dropped at the far end of the run, which forces wet hands and dripping pans across the cooking area.
- Position the fridge away from direct afternoon sun. Shade from a roof, wall, or deep overhang helps more than people expect. Verify that the door opens at least 90 degrees without hitting a handle, post, or adjacent cabinet. A problem is a fridge on the hot, exposed end of the kitchen; that makes it work harder and feel less reliable on long summer days.
- Use storage to support the task next to it. Put plates and glassware near the serving edge, cookware near the grill, and cleaning supplies under or near the sink. Verify that the most-used drawers open fully when the aisle is occupied. A problem is mixing all storage into one deep cabinet bank, which turns every grab into a search.
- Keep the trash pull-out inside the prep loop, not behind it. A 15- to 18-inch trash drawer usually works well in compact runs. Verify that raw packaging can move from fridge to trash without crossing the grill path. A problem is locating trash beside the fridge but across from the cook, which creates a traffic knot.
- Reserve a clear prep zone of at least 24 inches. More is better; 36 inches feels generous in a small outdoor kitchen. Verify that this zone is not interrupted by a sink faucet, paper towel holder, or grill side shelf. A problem is calling a narrow strip “prep” when it is really a landing strip for everything.
- Check service access before finalizing the plan. Gas shutoff, electrical outlet, water supply, drain route, and fridge ventilation all need accessible locations. Verify that panels can be reached without removing cabinets. A problem is burying a shutoff valve where it cannot be reached quickly or maintained later.
- Test the walking path with cardboard or tape. Lay out the full appliance footprint, including door swing and drawer pull. Verify that two people can pass with at least 36 inches of clear aisle space. A problem is a path that narrows at the fridge door or grill handle, because that is where friction turns into daily annoyance.
The biggest error is putting the fridge too far from the cook zone just because it “balances” the drawing. Balance is a design word; workflow is the one that matters. If the fridge is 8 or 10 feet from the grill, you’ll feel that distance every time you reach for drinks, marinades, or butter.
What should I check before I build the cabinet run?
Check clearances, utilities, and ventilation before you cut anything.
I’d treat the appliance manuals as the controlling document, then verify that the patio or deck can actually support the plan with a qualified professional if the structure, gas, or electrical work is not straightforward. A built-in grill is not just a box; it has heat, gas, and airflow requirements. An outdoor refrigerator is not just a smaller indoor fridge; it needs ventilation around the compressor and protection from ambient heat. A sink is not just a basin; it needs supply lines, drainage, freeze protection in cold climates, and a place for shutoff valves. That chain of requirements can feel like a rabbit hole, but skipping one link is worse.
Measure the total run from wall to wall, then subtract the appliance widths, filler panels, and end panels. People often forget that 24-inch, 30-inch, or 36-inch modules do not stack cleanly without fillers. A 1-inch or 2-inch filler can save you from a cabinet door that bangs a grill side shelf. I’d also check the grill manufacturer’s required clearance to combustible surfaces. Some systems allow tight framing with proper insulation or noncombustible enclosure materials; others do not. The difference matters because an outdoor kitchen framed like furniture can fail very differently from one built as a masonry or steel structure.
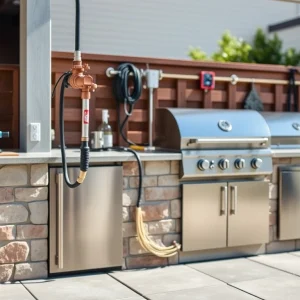
For the sink, confirm whether you are tying into existing water and drain lines or using a simple hose-fed setup with a removable basin strategy. If your climate freezes, exposed plumbing is a real problem. In that case, shutoff and drain-down access are not optional. For the fridge, verify ventilation at the back and below the cabinet. A fridge jammed flush into a hot enclosure will usually perform worse than one with the manufacturer’s specified breathing room.
The part generic advice misses is serviceability. You need a panel, door, or removable section that lets a plumber, electrician, or gas technician reach the connections without demolishing the island. If that access is not there on paper, it will not magically appear later.
When should I stop and change the plan?
Stop when the plan starts breaking clearances, service access, or traffic flow. That is the line where convenience turns into nuisance.
The grill lid hits a wall, post, or roof beam: this means the grill cannot open safely or fully — move the grill or change the overhead structure. A lid that opens only partway is a bad layout, not a minor compromise.
The fridge door opens into the main aisle: this means the aisle will be blocked during use — relocate the fridge or reverse the hinge only if the model allows it. A blocked door turns a quick grab into a bottleneck.
The sink is more than a few steps from the prep surface: this means wet prep, rinsing, and cleanup will spread across the run — move the sink closer to the working counter or make the prep counter wider. A distant sink is a daily irritation.
You cannot keep 36 inches of clear passage behind the cook line: this means two people will bump into each other — reduce appliance count, shorten the run, or change the kitchen to a single-user layout. Narrow aisles are where outdoor kitchens feel cramped fast.
Utilities require visible, permanent hoses or cords across walking space: this means the layout is not safe or durable — redesign the utility path before building cabinets. Surface runs are a trip hazard and a maintenance headache.
Storage only works with deep, stacked cabinets under one opening: this means access will be poor — split storage into smaller, task-specific drawers and doors. One giant cabinet is often the wrong answer for outdoor use.
The plan depends on placing the fridge in full sun with no shade: this means higher heat load and more stress on the unit — move it under cover or use the plan only if that exposure is unavoidable and accepted. I would not choose that layout if any shaded location exists.
The mistakes people make with outdoor appliance layout
First mistake: the grill goes in the center because it looks dramatic. Nice in a rendering; clumsy in real life. The result is poor traffic flow and not enough landing space. A better move is to treat the grill as the heat source, not the visual center, and give it real working room.
Second mistake: the sink gets treated like decoration. A sink that is 18 inches from a corner or jammed beside a burner line does not support prep or cleanup well. The cleaner alternative is to give it enough counter on at least one side for a colander, cutting board, or soap dish.
Third mistake: sun and wind are ignored. A fridge in direct sun or a grill in a hard crosswind will not behave as nicely as the sketch suggests. The fix is straightforward: place the fridge in shade where possible, and orient the grill so prevailing wind does not blow directly across the cooking face.
Fourth mistake: every possible appliance gets stuffed into the island. A pizza oven, beverage center, drawer fridge, sink, and grill in a 10-foot run sounds efficient on paper, but it usually leaves too little counter and too little storage. The smarter choice is the fewest appliances that match the way you actually cook.
Fifth mistake: open shelves replace drawer storage. Shelves look airy in renderings, but they collect dust, pollen, and grease. Closed drawers and doors are better for utensils, paper goods, cleaners, and grill tools.
Sixth mistake: the grill is forgotten as a heat source and the fridge as a heat-sensitive unit. Put them too close, and you create a hot-and-cold tug-of-war inside one cabinet run. I’d separate them with a real counter zone, not just a thin trim panel, unless the appliance manuals and cabinet system are specifically designed for tighter spacing.
What changes in a corner, an L-shape, or a small patio?
The layout changes by cutting the appliance count and protecting the working triangle. In a corner plan, the corner itself should usually hold storage, not the grill, because corner placement makes the lid, doors, and elbow room harder to manage. An L-shape works well when one leg handles heat and the other handles wash-up and cold storage. I’d keep the grill on the longer leg if you need room for a 24-inch landing zone on one side.
On a small patio, ruthless editing wins. A 6-foot straight run rarely supports all four elements comfortably unless the sink is small and the fridge is compact. In that case, I would prioritize grill, sink, and storage before I insisted on a full-size fridge. If you must include a fridge, choose a narrow undercounter unit and accept less base storage. That trade-off beats forcing a too-wide island into a 9-foot space. Plainly, the math stops working.
For a covered patio, overhead structure changes the picture. You have more options for weather protection, but you still need clearance above the grill and enough ventilation around heat-producing equipment. A roof does not cancel the manufacturer’s clearance rules. For an open patio, sun exposure makes shaded fridge placement and durable cabinet materials more important. In both cases, I would keep the most-used storage close to the grill and prep area rather than placing it at an island end where it looks tidy but works poorly.
What does a good layout look like when it is finished?
A good layout lets one person grill, rinse, grab cold items, and store tools without walking more than a few steps each time. The grill has a clean landing area, the sink has counter on at least one side, the fridge door opens freely, and the storage is arranged by task, not by leftover space. You should be able to stand there and not feel like you’re working in a hallway. That’s the real test.