Last updated: September 10, 2026
Key Takeaways
- A commonly cited range for outdoor grills is 1,200 to 1,500 CFM, but that is not a law.
- For a typical built-in gas grill under cover, outdoor hood ratings often start around 1,200 CFM and go up from there.
- If the manual calls for 36 inches of clearance and your design gives 28 inches, that is a problem, not a compromise.
- In a fully covered outdoor kitchen, both active exhaust and passive make-up air can matter.
A built-in grill tucked under a roof changes the whole equation. Suddenly, smoke, heat, and grease have somewhere to linger.
If your built-in grill sits under a roof, in a pergola, or inside an outdoor kitchen island, the real question in outdoor kitchen ventilation requirements for built-in grills is not “Do I need a hood?” but “How do I keep heat, smoke, and grease from collecting where the grill is installed?” My view is plain: for any built-in gas grill under overhead cover, I would plan ventilation from the start, not as an afterthought, and I would treat the grill maker’s installation manual as the first authority, then check local code and the hood manufacturer’s rating. That is the cleanest way to avoid a layout that looks finished but may trap smoke, overheat cabinetry, or void the grill warranty.
This applies to homeowners, designers, and remodelers working with a built-in gas or charcoal grill in a framed island, an enclosure, or a covered outdoor kitchen. I am assuming you already know the grill model, the enclosure material, and whether the space is open on all sides or partially roofed. Open-air setups with no roof or solid overhead structure often do not need mechanical ventilation. But once the grill sits under a ceiling, soffit, gazebo, pavilion, or near combustible finishes, the rules change fast. For natural gas and propane appliances, the manufacturer’s manual carries as much weight as the building code — sometimes more.
What outdoor kitchen ventilation is actually for
Outdoor kitchen ventilation exists to move heat, smoke, grease vapor, and combustion byproducts away from the grill and the enclosure. A vent hood is one common tool, but outdoor kitchen ventilation requirements for built-in grills can also be met with other design choices. Some layouts use passive openings at the base and top of the island to reduce gas buildup and let hot air out. In a fully covered outdoor kitchen, both active exhaust and passive make-up air can matter.
The mistake I see most often is simple: people assume a built-in grill “outdoors” means “no ventilation needed.” Not so. A grill under a 10-foot pavilion is not the same animal as a grill on an open patio. Heat rises, yes, but a roof traps it; the smoke just hangs there. Grease-laden vapor can stain ceilings, damage finishes, and leave a mess that does not show up on a quick spec sheet. Some grill makers specify a minimum hood canopy size, a minimum mounting height above the cooking surface, and a certain exhaust rate in cubic feet per minute, or CFM, for exactly this reason.
A second mistake is pretending one universal number fits every grill. It doesn’t. A compact 24-inch grill, a 42-inch searing station, and an infrared-heavy setup can call for different airflow and different clearances. I would start with the grill’s installation guide, then compare it with the hood manufacturer’s rating and the enclosure geometry; if the manual and the site conditions clash, I would call a licensed contractor or ventilation professional. For example, many outdoor hood systems are listed at 1,200 CFM, 1,500 CFM, or higher, but the right choice depends on canopy depth, duct length, and whether the grill is under solid overhead cover. That math stops working fast when someone guesses.
If you want a reliable rule of thumb, start here: built-in grills under any roof or solid canopy should have a ventilation plan, even if that plan is passive-only in a very open structure. That plan should preserve manufacturer-required clearances and allow heat to escape without cooking the cabinet above it.
What does a built-in grill need for ventilation?
A built-in grill needs enough clearance and a route for hot air and combustion gases to leave the enclosure. The exact requirement comes from the grill’s manual, but the structure around it usually needs three things: top-space management for heat, front or rear openings for make-up air, and — when the grill sits under cover — a hood or other exhaust strategy sized to the appliance.
“Make-up air” simply means replacement air that enters as exhaust leaves. Without it, a hood can pull poorly, especially in a tight enclosure. In practical terms, that may mean louvers, vents, or open sides near the base of the island, plus an exhaust path above. The point is pressure balance, not decoration.
I would check three figures before a single board is cut:
- Grill manual clearance requirements. Many built-in units specify minimum side, rear, and overhead clearances. Some can be closer to noncombustible surfaces than to combustible ones, but the manual controls.
- Hood coverage and overhang. The canopy should extend beyond the cooking surface so smoke is captured instead of escaping around the edges.
- Hood airflow rating, in CFM. A commonly cited range for outdoor grills is 1,200 to 1,500 CFM, but that is not a law. It is a sizing discussion, and deep canopies or large grilling surfaces may need more.
I also look at the enclosure material. Concrete board, masonry, and stone handle heat differently than wood framing hidden behind veneer. A “noncombustible face” does not cancel combustible structure behind it. If the grill maker requires a metal liner, heat shield, or insulated jacket, that is not optional. It belongs in the safety envelope.
Two authoritative references worth checking are the National Fire Protection Association (NFPA) guidance on gas equipment clearances and the International Code Council (ICC) model code provisions adopted locally in many jurisdictions. The U.S. Consumer Product Safety Commission (CPSC) also publishes safety guidance on grill placement and clearances. Local amendments can be stricter than the model code. The grill manual still wins if it is more restrictive.
How do I size and place the ventilation?
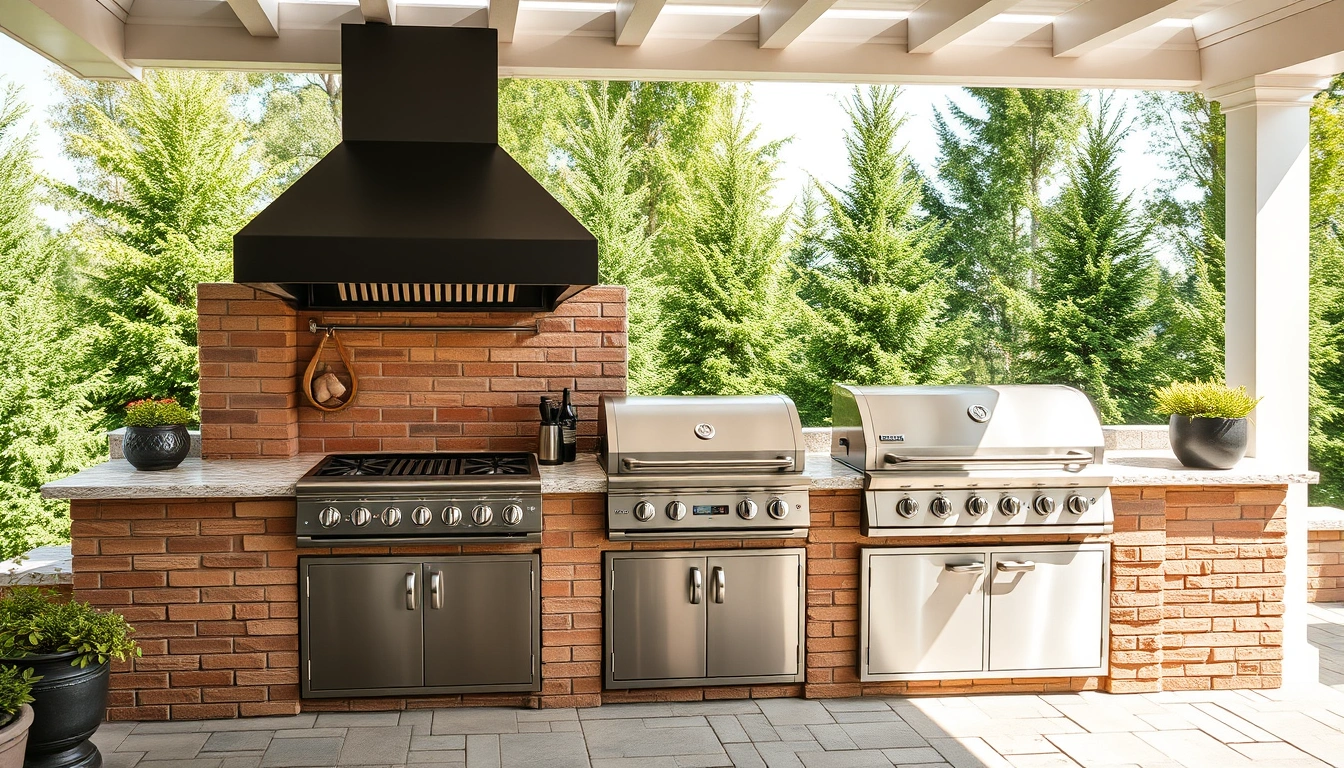
You size and place ventilation by matching the grill, the roof, and the enclosure rather than by copying a generic outdoor-kitchen plan. Start with the manual, then choose a hood and vent layout that gives smoke a short, direct path out of the space.
- Read the grill installation manual first. Confirm the model number, fuel type, and required clearances above, behind, and to the sides. Verify whether the manufacturer requires a hood in covered installations. If the manual calls for 36 inches of clearance and your design gives 28 inches, that is a problem, not a compromise.
- Measure the cooking footprint, not the cabinet opening. Use the actual grate width and depth. Verify the canopy covers the full active cooking area plus margin at the front and sides. If the hood is narrower than the grill, smoke will escape around the edges.
- Check the ceiling or roof height. Record the distance from the cooking surface to the underside of the hood, and from the hood to the overhead structure. Many outdoor hoods need generous mounting height; too low and they crowd the cook, and too high and capture drops. If the hood sits so high that smoke spills before capture, the layout is wrong.
- Choose an exhaust rate that fits the appliance. For a typical built-in gas grill under cover, outdoor hood ratings often start around 1,200 CFM and go up from there. Verify the hood is rated for outdoor use and for the length of duct run you plan. If the fan is undersized, grease and heat stay in the enclosure.
- Plan a duct route with the fewest turns. Each elbow adds resistance. Keep the duct as short and straight as the house allows, and use the duct diameter the hood maker specifies, often 10 inches or 12 inches for high-output outdoor systems. If the route zigzags through framing, expect weaker capture.
- Provide make-up air openings. Add low openings or vents so exhaust does not starve the hood. Verify that the island is not sealed tight from floor to counter. If the hood roars but smoke still hangs, the system may be fighting its own pressure.
- Respect noncombustible separation around the grill. Confirm the cabinet liner, side walls, and nearby trim meet the grill’s material requirements. If the hood is correct but the enclosure uses wood too close to the firebox, ventilation will not fix a code problem.
- Check for service access. Leave room to clean the hood filters, inspect the fan, and reach the gas shutoff. If maintenance requires dismantling the island, the design is too tight.
A good result is not “no smoke anywhere.” A good result is a grill that lights normally, a hood that captures the plume, cabinet surfaces that do not discolor, and a cook who is not standing in a heat pocket. If you cannot get all four, the design still needs work.
What do people get wrong about outdoor grill ventilation?
The biggest error is underestimating how much a covered outdoor kitchen behaves like a room. A roof, a back wall, and a long island can trap air the way an indoor kitchen does, but without the same standardized exhaust assumptions. That is why a 36-inch grill under a gazebo often needs more thought than a 48-inch grill in the open.
Common mistakes and what they cost:
- Skipping the hood because the space is “outdoor.” The consequence is smoke staining, heat buildup, and greasy residue on the ceiling. The better alternative is a hood or an approved open-air layout with proper clearances.
- Using a hood that is too small for the grill width. The consequence is poor capture at the ends of the grate and smoke spilling into the seating area. The better alternative is a hood that overhangs the cooking surface on both sides.
- Ignoring make-up air. The consequence is weak exhaust, whistling vents, and a hood that cannot move air as rated. The better alternative is planned passive openings or a dedicated make-up air path.
- Running a long, twisting duct. The consequence is lost airflow and grease accumulation in bends. The better alternative is a short, straight run with the fewest elbows possible.
- Treating combustible trim like masonry. The consequence is heat damage or a failed inspection. The better alternative is to follow the grill’s combustible and noncombustible clearance rules exactly and to confirm the details with the installer or local inspector.
- Mounting the hood too high or too low. The consequence is either poor capture or an intrusive cooking position. The better alternative is to stay within the hood and grill manufacturer’s specified mounting range.
The cost of getting this wrong is not abstract. It can mean reworking cabinetry, replacing a hood, or tearing out finish materials that warped or stained. On a finished outdoor kitchen, that is expensive and frustrating in a very real way.
When should I stop and change the design?
You should stop and change the design whenever the layout no longer matches the grill manual, the roof structure, or the hood’s rated use. That is not a sign of failure; it is the point where the plan stops being safe or sensible.
The grill manual requires no hood, but the grill is under a solid roof: that means the appliance may be acceptable in open air but not under cover — add the specified ventilation or redesign the cover.
You cannot meet the stated clearance above the cooking surface: that means heat and smoke will sit too close to the structure — change the ceiling height, lower the cooking zone, or choose a different grill.
The island is sealed tight with no low openings: that means the hood may starve for air and the enclosure may trap heat — add make-up air openings or revise the cabinet base.
The duct run needs multiple elbows or a long horizontal stretch: that means airflow will fall off and grease will collect in the line — shorten the run or relocate the exhaust.
The hood is not rated for outdoor use or for the grill’s output: that means the fan and enclosure may not handle the heat, grease, or weather exposure — replace it with an outdoor-rated unit sized for the appliance.
Combustible materials are closer than the manual allows: that means the finish or framing may overheat — use noncombustible materials or move the grill farther from the structure.
If any of those show up after framing starts, I would stop and redraw before trim, tile, or stone goes in. Once the finish work is complete, the fix gets expensive fast.
What changes with charcoal, infrared, or extra-large grills?
You modify the standard approach when the grill produces more heat, more smoke, or a more concentrated plume than a basic mid-size gas model. Charcoal grills typically make more smoke and grease-laden vapor, so they are harder to capture cleanly under a hood. Infrared burners can throw intense localized heat, which makes clearance and heat shielding more important. Extra-large built-in grills, such as 42-inch and 54-inch units, can outgrow a hood that would be fine over a smaller appliance.
For charcoal, I would not assume a standard gas-grill ventilation plan will work. The smoke load is higher, and a sheltered structure can feel oppressive quickly. For infrared, I would focus on the manufacturer’s clearance and heat-shield instructions. For oversized grills, I would check whether the hood canopy actually extends past the full active cooking surface by enough margin to catch rising air.
There is also a practical trade-off: stronger exhaust can improve capture, but it can also increase noise and cost. A higher-CFM outdoor hood is not free in comfort or budget. Some systems require heavier ducting, larger electrical service, or more careful make-up air planning. If your outdoor kitchen is small and close to neighbors, a big exhaust fan may be overkill even if it technically fits. In that case, a less enclosed design may be the better answer.
A specific standard to look for is outdoor hood certification from a recognized testing body, often listed as UL or ETL. That does not replace installation rules, but it tells you the equipment is intended for this kind of duty. If the hood lacks outdoor rating, I would not use it above a built-in grill under cover.
A short checklist before you build
You are ready to build when the grill manual, the hood spec, and the enclosure drawing all agree. I would check these items one last time:
- Grill model number and fuel type match the manual.
- Overhead cover, if any, has a real exhaust plan.
- Hood width covers the full grill area.
- Hood is outdoor-rated and sized for the appliance.
- Duct path is short, straight, and correctly sized.
- Make-up air is part of the design.
- Clearances to combustibles are met.
- Service access is still possible after finish materials go in.
If one box is missing, do not hope it will work out on site. Ventilation is easiest to fix on paper.
FAQ
Do all built-in grills need a hood?