Last updated: October 21, 2026
Quick Answer: the right outdoor kitchen plan usually starts with the site, and a practical first pass is to size the kitchen around the space you can support, not the appliances you want. Outdoor kitchen planning and site conditions matter most when the patio floods, the wind pushes smoke into the house, or the slab can’t carry the load. In Outdoor kitchen planning and site conditions — The Complete Guide, the right answer is to match the layout, utilities, and structure to the yard you actually have.
What actually determines the right outdoor kitchen plan?
The site determines the plan more than the menu does. If you have level ground, easy utility access, and a protected patio, then a built-in kitchen can be straightforward. If the yard slopes, sits on expansive clay, or catches hard wind, then the design has to change before a single cabinet is ordered.
The first decision is whether the kitchen belongs on an existing slab, a new slab, a deck, or a paver patio. That choice affects everything: footing depth, cabinet anchoring, venting, drainage, gas line routing, and electrical runs. A freestanding grill on a patio can be simple. A masonry island with a sink, refrigerator, and pizza oven is a small building project.
Think in terms of constraints, not features. A 36-inch grill, side burner, and undercounter refrigerator might fit beautifully on paper, but they may fail in a narrow side yard where the service access is blocked and smoke drifts toward neighbors. A kitchen on the west side of a house may need shade and heat control; one under trees needs clearance from branches, gutters, and falling debris.
Here is the basic rule: if the site is easy, design for convenience; if the site is difficult, design for durability and drainage first, convenience second. A lot of generic advice gets this backward and starts with appliances.
| Situation | Best Path | Why Other Options Fail |
|---|---|---|
| Flat patio near gas, water, and power | Compact built-in island with short utility runs | Oversized kitchens waste space and money without adding usefulness |
| Sloped yard or poor drainage | Regrade, add base prep, and build on a proper slab or paver base | Setting cabinets on an uneven surface leads to movement and water damage |
| Deck or raised structure | Use a lightweight, code-compliant kitchen plan approved for the structure | Heavy masonry can exceed structural limits |
| Tight side yard or windy exposure | Smaller footprint with wind-aware appliance placement | Large hoods, tall walls, or open flames can become safety problems |
If you want the simplest good plan, start with the site map, then place the kitchen where utility access, drainage, and traffic all work together. Quick check: if your first concern is “What can the yard support?” this is the right section for you.
How do I know if my yard can handle an outdoor kitchen?
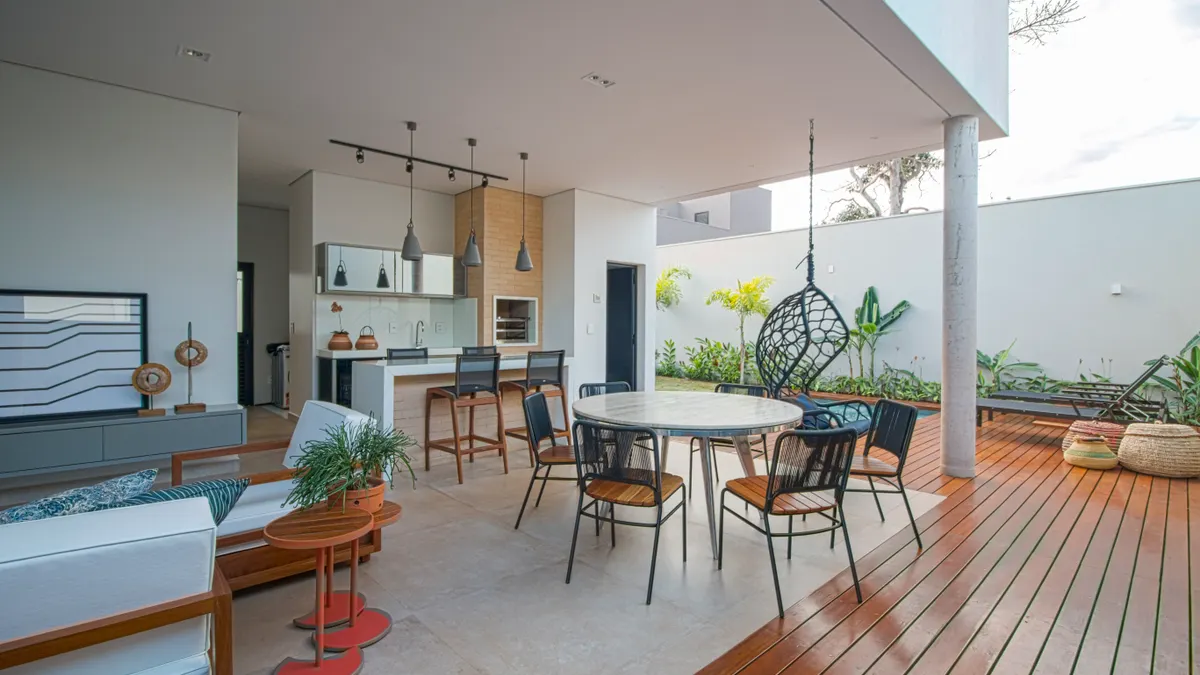
Your yard can handle an outdoor kitchen if it can support the load, keep water moving away from the cooking area, and give you safe access to gas, electricity, and service clearances. If any one of those fails, the project needs redesign before construction begins.
Start with grade. A site that falls away from the house can be useful for drainage, but it may need retaining work or a stepped foundation. If the ground is soft, recently filled, or visibly settles after rain, do not assume a surface paver patio will hold a heavy island. A masonry kitchen with stone veneer, granite, appliances, and stored accessories can become very heavy very quickly, so the base matters.
Then look at water. If water pools after rain, the kitchen should not sit in the low spot. A cooking area that traps water will shorten cabinet life, corrode hardware, and make electrical components a headache. Surface water should move away from the structure, not through it.
Utility access is the next gate. Gas, water, and electric should reach the kitchen with the shortest practical run, but never at the expense of code or safety. Gas piping needs proper sizing and shutoff placement; electrical circuits for outlets, lighting, and refrigeration usually need GFCI protection and weather-rated components. The National Electrical Code is the reference point for many outdoor electrical installations, and gas work should follow local code and a licensed pro’s guidance. For code details, see the National Fire Protection Association’s National Electrical Code resources and the International Code Council’s outdoor fuel gas and electrical guidance.
Use this sequence:
- Measure the available footprint, including swing space for doors, drawers, and traffic lanes.
- Check the slope with a level or laser level and note any low spots that collect runoff.
- Identify where gas, water, and electrical service can reach without crossing high-traffic paths.
- Confirm overhead clearance from eaves, branches, pergolas, and roof edges.
- Decide whether the base needs a new slab, reinforced pad, or a different location altogether.
If the answer to step 2 or 3 is ugly, don’t force the design. Move the kitchen, shrink it, or budget for site work. The standard advice that says “just put it where it looks best” is wrong on difficult lots. Quick check: if you have pooling water, a slope, or uncertain utility access, assume the site needs correction before design.
What should change if you’re building on a slab, deck, or pavers?
The base type changes the whole project, because slabs, decks, and pavers each support different loads and different kinds of attachment. If you are on a structural concrete slab, the plan is usually the most flexible. If you are on a deck, the plan becomes much more limited. If you are on pavers, the base may be fine for a light setup but not for a heavy masonry island without special preparation.
A slab gives you a stable, level platform, but it still needs to be checked for cracks, drainage, and thickness if the kitchen will be heavy. A cracked slab is not automatically a deal-breaker, but active movement, heaving, or standing water are warning signs. The kitchen should not bridge a failing surface and pretend the problem is cosmetic.
Decks need the most caution. A deck that supports people is not automatically ready for a grill island, refrigerator, or stone veneer. A built-up kitchen can overload joists or trap heat against combustible materials. Many deck projects are better kept to a lightweight grill station with proper clearances than forced into a masonry look.
Pavers sit between the two. A well-built paver base can work well for an outdoor kitchen, but only if the base is deep, compacted, and designed for the concentrated load. Randomly laid pavers over thin bedding sand are not enough for a serious island.
If you’re choosing among these, use this order:
- Check whether the structure is designed for the finished weight, not just foot traffic.
- Confirm code clearances for the appliance, especially around heat sources and combustible materials.
- Decide whether the kitchen will be anchored permanently or built as a lighter modular system.
- Verify drainage so water does not collect under cabinets or around appliance bases.
- Match the finish to the support, not the other way around.
The wrong move is to choose an “outdoor kitchen style” first and figure out the support later. That is how expensive repairs start. Quick check: if your site is a deck or anything above grade, the support structure should drive the design. For related planning detail, see the outdoor kitchen design ideas guide and the deck outdoor kitchen safety page.
Which layout works best for your site?
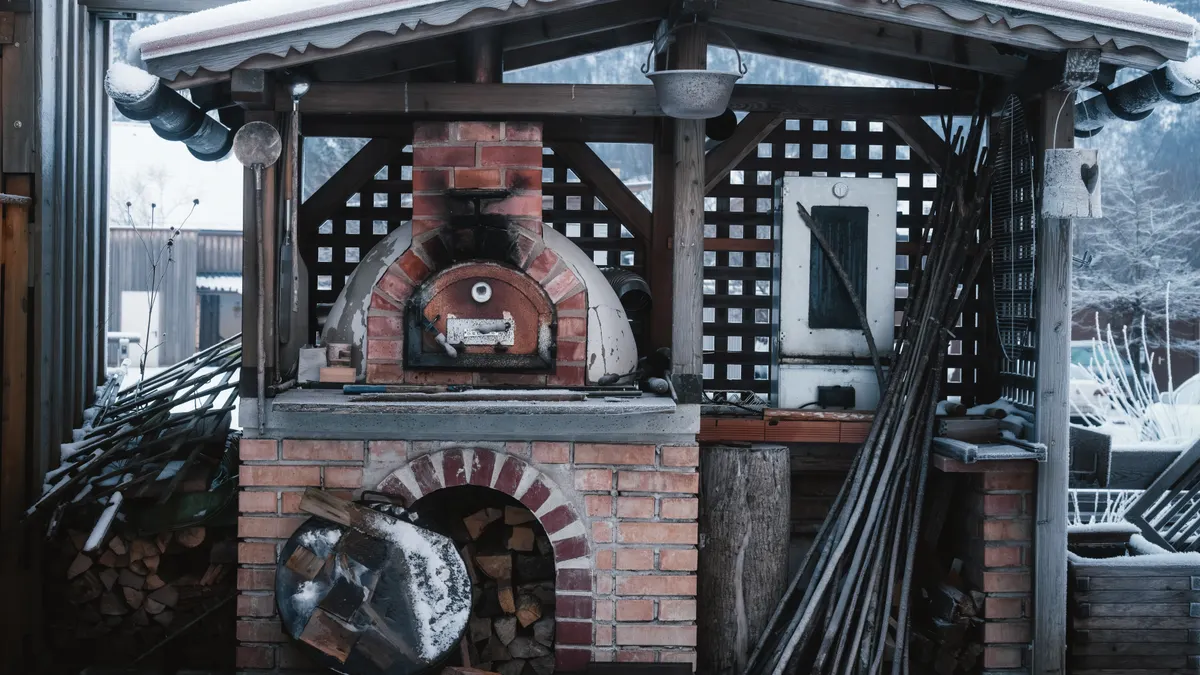
The best layout is the one that fits the traffic pattern, wind direction, and utility access on your property, not the one that looks best in a showroom. If the grill smoke needs to move away from the house, the kitchen should be placed accordingly. If guests gather around the prep area, the layout should avoid bottlenecks. If the site is narrow, an L-shape may be too much and a straight run may work better.
A straight-line layout is usually the simplest option for smaller patios and narrow side yards. It keeps plumbing, gas, and electrical runs short and makes construction easier. The drawback is that it can feel cramped if you try to add too many appliances.
An L-shape gives better separation between hot and cold tasks. One leg can hold the grill and searing zone; the other can handle prep, refrigeration, and storage. It works well when the patio has enough width to avoid crowding.
A U-shape offers the most workspace, but it needs room. If the opening is too tight, people collide and the kitchen becomes hard to use. U-shapes also tend to demand more labor, more material, and more utility routing.
Think about wind before you think about aesthetics. If your site gets prevailing wind from one side, put the grill where airflow does not blow smoke directly into seating or toward the house. A pergola, side wall, or planter screen can help, but do not box in a gas grill without respecting manufacturer clearances and ventilation needs.
A practical layout decision process looks like this:
- Mark the patio with painter’s tape or chalk at full appliance width.
- Walk the space with doors and drawers imagined open, not closed.
- Stand where the wind usually comes from and note smoke direction.
- Place trash, prep, and storage where you can reach them without crossing hot zones.
- Keep the main aisle wide enough for two people to pass without turning sideways.
If the kitchen is meant for a crowd, give it circulation room first and add storage second. If it is for one cook and a small table, a compact run is usually the better answer. Quick check: if you can sketch your kitchen in one line, one corner, or a U, choose the smallest shape that still keeps movement easy. For more on layout tradeoffs, see the compact outdoor kitchen layouts page and the outdoor kitchen traffic flow guide.
What utilities and clearances matter most?
Gas, electricity, water, and ventilation matter more than the countertop finish because they decide whether the kitchen is safe, serviceable, and legal. If you can’t place utilities correctly, the design needs revision. If you can, the rest is mostly finish work.
Gas lines should be planned by a qualified professional and sized for the total load, not just the grill. If you add a side burner or fire feature later, the original sizing may no longer be enough. Liquid propane and natural gas are not interchangeable in practice without proper conversion kits and correct orifices. Never treat a conversion as a casual swap; if you are changing fuel type, consult a licensed professional and follow the appliance manufacturer’s instructions and local code.
Electrical work needs outdoor-rated equipment and protection from moisture. In many installations, this means GFCI-protected outlets, weatherproof covers, and lighting rated for exterior use. Refrigerators and ice makers need ventilation and service access, not just a place to slide them in. Starving them for airflow shortens their life.
Water adds another layer. A sink is useful only if the plumbing is protected from freezing in your climate and drain routing is handled correctly. If winter temperatures regularly drop below freezing, exposed lines and shallow drains can become expensive mistakes.
Clearances are not optional decoration. Appliances need space around them for heat dissipation and safe use. A grill tucked too close to a wall, column, or cabinet end panel becomes a hazard. Manufacturers publish clearances for a reason, and local code can be stricter.
Use this checklist before you build:
- Confirm the fuel type and appliance model before rough-in.
- Plan shutoff valves and electrical disconnects where they can be reached quickly.
- Keep service panels accessible after the kitchen is finished.
- Leave enough ventilation space around refrigerators, grills, and vented appliances.
- Keep plumbing protected from freezing, UV exposure, and physical damage.
The wrong advice here is “just run the lines wherever they fit.” Hidden utilities are not a victory if they are impossible to service or fail in winter. Quick check: if you are adding a sink, fridge, or anything beyond a grill, utility planning is no longer optional. For installation standards, the NFPA and ICC resources are the starting point, and utility work should be verified locally before construction.
When the standard outdoor kitchen advice is wrong
Standard advice is wrong if your site has slope, wind, freezing weather, poor drainage, or a structure that can’t take extra weight. In those cases, the answer is not “build less carefully”; it is “change the design.”
If the yard is steep, a large island may need retaining walls, terracing, or a different pad location. That changes cost and labor, but it prevents a kitchen that feels crooked or sheds water toward the house. If the property sits in a freeze-thaw climate, the details of the base, plumbing, and cabinet materials matter more than fancy finishes. Water trapped in the wrong place will expand, crack, or rot components; a licensed contractor or structural professional should confirm the base and drainage before you commit to the layout.
If the site is very windy, open shelving and flame-heavy appliances become less pleasant and sometimes less practical. Wind baffles can help, but they are not a cure for a bad location; consult a professional if the wind exposure is severe or if the appliance manufacturer has specific clearance requirements. If smoke naturally blows toward a seating area, move the cooking zone or redesign the airflow path.
This is the section where the usual “just get the biggest grill you can afford” advice falls apart. Bigger is not better if the site cannot support it. A smaller, better-placed kitchen will usually outperform a large one that fights the yard every day.
Here are the cases that change the answer:
- Steep slope: what changes is drainage and foundation work; what to do instead is terrace, step the pad, or relocate the kitchen to a flatter area.
- High wind exposure: what changes is smoke behavior and flame stability; what to do instead is shelter the cooking zone without violating appliance clearances.
- Freeze-prone climate: what changes is plumbing and material selection; what to do instead is use freeze-protected lines, winterizeable plumbing, and weather-resistant finishes.
- Old or light-duty deck: what changes is load capacity; what to do instead is keep the setup light or rebuild the structure for the intended weight.
- Narrow yard: what changes is circulation; what to do instead is choose a compact linear layout instead of forcing an island.
The honest limitation is simple: not every yard should get a full masonry outdoor kitchen. Some sites are better served by a grill cart, a prep table, and a weatherproof storage cabinet. That is not a compromise if the site can’t honestly support more. Quick check: if your lot has wind, slope, freeze risk, or a weak structure, the normal “luxury kitchen” advice does not apply. For more context, see the outdoor kitchen winterization guide and the wind exposure planning page.
How do I plan the build step by step?
The right build plan starts with the site survey and ends with a coordinated rough-in, not with appliance shopping. If you want a kitchen that works on day one, follow the sequence in order. Skipping steps is how cabinets land over drain lines and refrigerators end up without ventilation.
- Map the site. Measure the patio, note slope, locate doors, windows, vents, trees, and overhead obstructions.
- Choose the base. Decide whether the kitchen sits on a slab, paver base, or structurally approved deck area.
- Select appliances around the site. Pick a grill size, refrigeration, sink, or storage package that fits the actual footprint.
- Plan utilities. Place gas, electric, and water where they can be run safely and accessed later for service.
- Check clearances and ventilation. Compare the plan with manufacturer requirements and local code.
- Detail drainage and finishes. Confirm where water goes, what materials can handle sun and moisture, and how cabinets will be sealed.
- Build and test before full finish-out. Test doors, ignition, lighting, outlets, and water flow before the final trim is complete.
The most useful benchmark is not a magazine photo; it is a kitchen that can be used without workaround behavior. Can you walk behind the cook? Can you open a refrigerator door fully? Can you clean the grill without dragging grease across the seating area? Can a plumber or electrician reach the service point later? Those are the real pass/fail questions.
Budget choices should follow the site, too. If utility runs are short and the pad is already good, you can spend more on appliances and counters. If the site needs grading, drainage correction, or a structural rebuild, the money should go there first. A premium appliance in a bad location is still a bad outdoor kitchen.
Quick check: if you have not mapped the site, chosen the base, and confirmed utilities, you are still in planning, not building. For a deeper checklist, see the outdoor kitchen site survey guide and the utility rough-in checklist.
Edge cases that break the normal rules
The normal rules break down when the site has one strong limitation that outweighs everything else. Here is what changes and what to do instead.
- Small urban patio: what changes is footprint and neighbor proximity; what to do instead is use a single straight run, prioritize smoke control, and avoid oversized appliances.
- Rooftop or elevated terrace: what changes is structural load and wind; what to do instead is get a structural review and use lighter modular components.
- Coastal site: what changes is corrosion; what to do instead is choose marine-tough hardware, stainless where appropriate, and finishes that tolerate salt exposure.
- Heavily wooded yard: what changes is debris and clearance; what to do instead is keep the kitchen away from branches and roof edges and avoid placing it under constant leaf drop.
- Cold-climate secondary home: what changes is seasonal shutdown; what to do instead is make winterization easy, with accessible shutoffs and drain-down points.
- Very irregular lot: what changes is geometry; what to do instead is build to the site’s natural lines rather than forcing a symmetrical island that wastes space.
Each of these scenarios changes the design brief, and pretending otherwise is how outdoor kitchens become maintenance projects. A site that looks “good enough” in midsummer can be a problem in November, after a storm, or during the first freeze. Quick check: if your yard has one glaring constraint, design around that constraint first and style second. For a few of these edge cases, the outdoor kitchen permit checklist can help you confirm local requirements before work begins.
What should you choose if you want the safest, smartest path?
The safest, smartest path is the smallest design that fits the site, supports the appliances you actually need, and leaves access for service. If your yard is easy, that may be a full built-in kitchen with stone, gas, water, and power. If your yard is difficult, the smart move may be a compact grill station and nothing more.
Choose the full build only if these are all true: the base is sound, drainage is controlled, utilities can be routed correctly, clearances are available, and the layout gives you real working space. If one of those is missing, scale back or redesign. That is not settling; it is good site planning.
A lot of outdoor kitchen regret comes from picking features before conditions. The site should tell you whether the kitchen should be permanent, modular, light, or minimal. That judgment is more important than the countertop color or the brand badge on the grill.
For the reader trying to make a clean decision, the rule is plain: if the site is stable and the utilities are simple, build a more complete kitchen. If the site is uncertain, slope-heavy, windy, or structurally limited, build less and build smarter. Quick check: if you can explain your project in one sentence that includes slope, drainage, and utility access, you are ready to move from ideas to a real plan. For next steps, the outdoor kitchen planning guide and the appliance comparison page can help narrow the list.
Key Takeaways
- The site decides the kitchen more than the appliance list does.
- Drainage, slope, wind, and structural support are the first four questions to answer.
- Slabs, decks, and pavers each change the design in different ways.
- Utility planning is not a late-stage detail; it shapes the layout from the start.
- Big kitchens are a bad fit for small, windy, wet, or weak sites.
- The best outdoor kitchen is the one that works with the yard instead of fighting it.
Drafted with AI; not yet reviewed by a person.