Last updated: September 10, 2026
Key Takeaways
- Mark the exact length and depth of the space and subtract 3 to 6 inches at edges for tolerances and finish material.
- Standard counter height is often around 36 inches, but seating overhangs, appliance doors, and vent openings may need adjustment.
- A lot of bad outdoor kitchens come from ignoring service access.
- Real outdoor kitchens need room for walking, carrying, opening, and cleaning.
Before the first trench gets dug, the biggest outdoor kitchen design mistakes avoid before construction starts usually have already happened: appliances are ordered in the wrong sequence, wind and drainage get brushed aside, utilities are underbuilt, and the grill area is left cramped. Homeowners who already know they want a grill island or a full cooking zone are the audience here. They want to dodge costly redesigns, code headaches, and layouts that look fine on paper but fail in real use.
Table of Contents
- Who this is for — and who should do something else
- What should I decide before I pick appliances?
- How do I design the layout so construction does not box me in?
- What are the outdoor kitchen design mistakes that cost the most?
- When should you stop and redesign?
- What people get wrong about materials, ventilation, and weather
- What should the site and utilities be checked for before the pour?
- FAQ
Who this is for — and who should do something else
This applies if you are planning a permanent outdoor kitchen with at least one built-in appliance, a countertop run, and utility access for gas, electric, water, or drainage. It assumes you already know the difference between a portable cart grill and a built-in installation, and that you are working from a yard, patio, or deck where construction is possible.
Not a simple weekend DIY? Usually, no. If you need a new gas line, a 240-volt circuit, or a sink with drainage tied into plumbing, that work affects layout, clearance, and inspection. A licensed plumber, electrician, or gas fitter is the right move when you are adding permanent services, trenching under slab, or working near a load-bearing deck structure. The NFPA’s outdoor cooking guidance and the IRC both point you back to code, not guesswork: see NFPA 1 and the International Residential Code.
The first mistake is simple: people start with appliance shopping instead of site planning. A 36-inch grill, a 24-inch undercounter refrigerator, and a pizza oven do not fit just because the combo sounds appealing. Footprint, door swing, service clearances, and heat zones matter more than the catalog photo. Code still rules the roost. The National Fire Protection Association publishes outdoor cooking safety guidance under NFPA 1 and related fire code sections, and local building departments often have their own setback rules for combustible surfaces and overhangs. Ignore those, and the plan is wrong.
I also want to be clear about what this article is not for. A freestanding grill on an existing patio with a side table beside it does not need this level of planning. A masonry island with a sink, refrigeration, lighting, and a vented grill enclosure absolutely does. For a broader planning checklist, see our outdoor kitchen planning guide and grill island ideas.
What should I decide before I pick appliances?
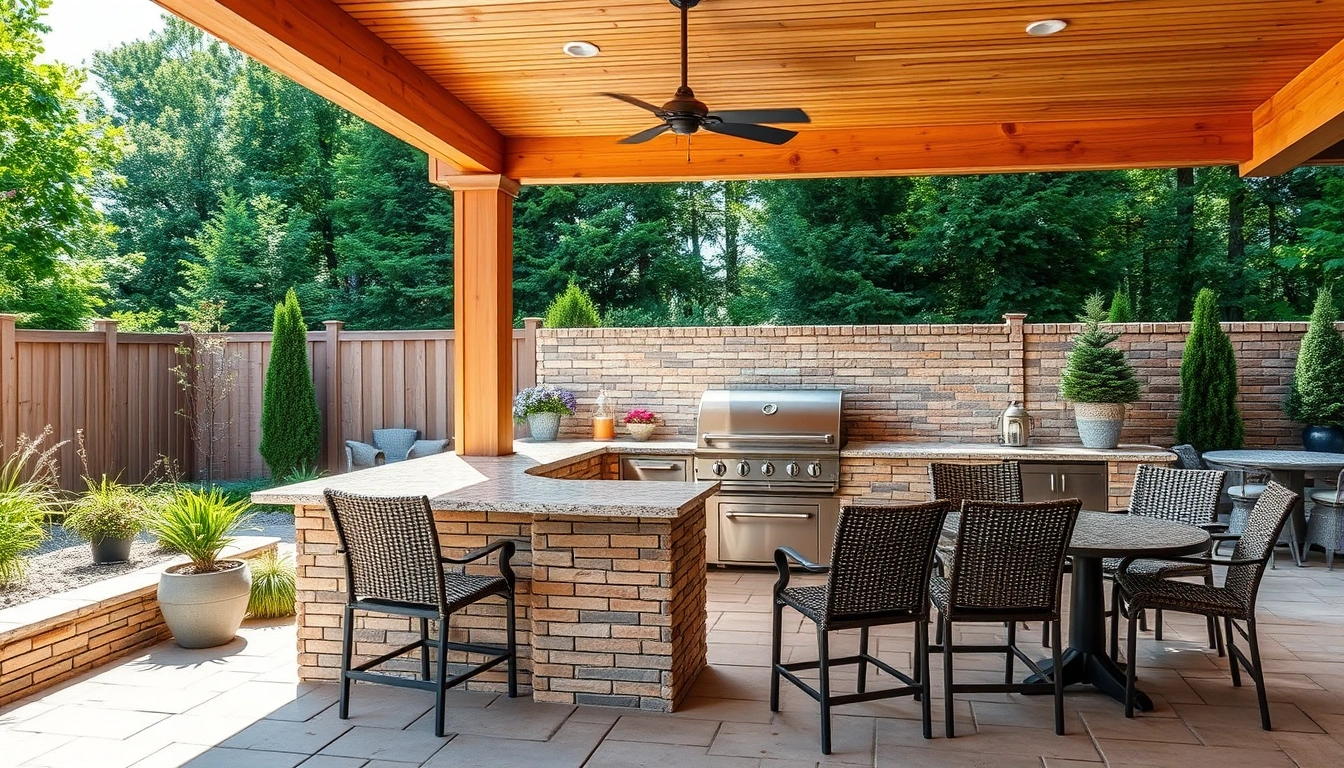
Decide the layout, utilities, and use case before you choose the grill or refrigerator. That sequence saves money; it also cuts down on rework.
Start with the job itself. Is this a two-person weeknight station, a crowd-heavy entertaining area, or a full second kitchen? A compact grill zone may only need 6 to 8 linear feet of wall or island length. A larger station with prep, storage, and a trash pullout often needs more like 10 to 14 feet once you count usable counter space and appliance trim.
Then map the site in the direction people will actually move. I would sketch the yard, door locations, stairs, hose bibs, and prevailing wind before touching an appliance spec sheet. A grill placed under the strongest wind path will fight uneven heat and smoke blowback. A sink placed far from the main entry turns every prep run into a drip trail across the patio. That can snowball fast — and a patio layout checklist can save you from rework.
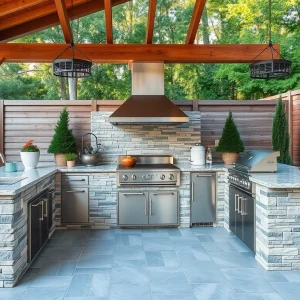
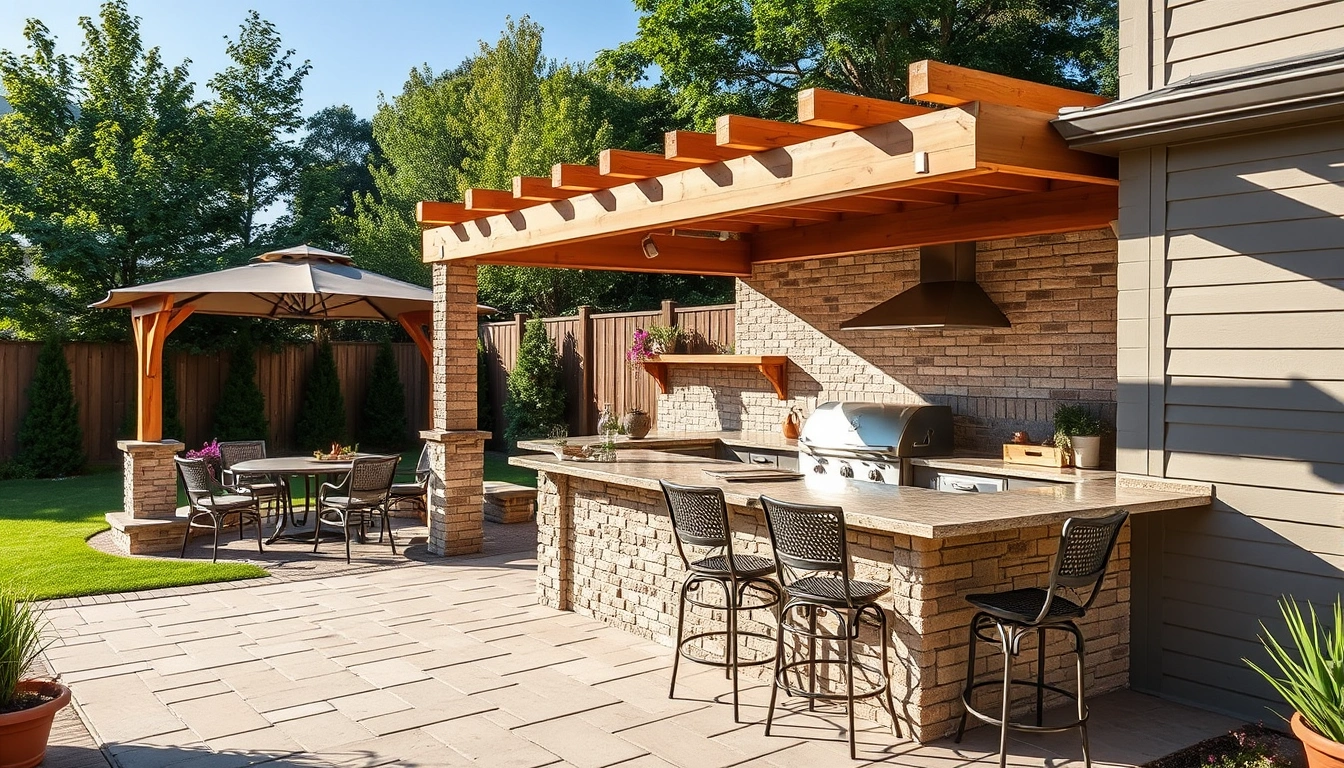
The core idea is plain: keep the hot, wet, and cold elements from colliding. Grill, side burner, and pizza oven are hot. Sink and trash are wet. Refrigerator and beverage center are cold. Put the heat source on the outside edge of the kitchen run, not trapped in the middle, so someone can reach prep space without crossing the cook zone. Keep at least 24 inches of landing space on one side of the grill and 12 to 24 inches on the other, with more if you expect to set down platters or raw food safely. If space is tight, cut an appliance before you cut prep room.
A lot of bad outdoor kitchens come from ignoring service access. Every appliance still needs a way to be reached, removed, or repaired. A refrigerator shoved into a tight masonry pocket without front ventilation or a removable panel becomes a future headache. Same story for gas shutoff valves hidden behind fixed stone. A utility access hatch is easier to plan now than to add later.
How do I design the layout so construction does not box me in?
Fix clearances, service routes, and structure before you draw the polished version. Dimensions come first. Finishes come later. And the outdoor kitchen design mistakes avoid before construction starts theme stays practical, not decorative.
- Measure the usable pad or patio area in inches, not just feet. Mark the exact length and depth of the space and subtract 3 to 6 inches at edges for tolerances and finish material. Verify that the remaining rectangle can hold the appliance widths plus counter space. If the footprint only works on paper with zero margin, the layout is too tight.
- Place the grill and note manufacturer-required clearances. Built-in grills often specify side, rear, and top clearances in the installation manual; many also require noncombustible surrounds and a minimum opening for ventilation. Verify the model’s cutout dimensions and combustion air requirements before framing. If you cannot meet the listed clearances, choose a different appliance or change the structure. For gas work, consult a licensed professional and review the appliance manual plus local fuel-gas code rather than treating the countertop plan as the last word; the [NFPA fuel gas resources](https://www.nfpa.org/codes-and-standards) are a good place to start.
- Reserve landing zones on both sides of the cook surface. Plan for at least 24 inches of uninterrupted counter next to the main grill and 12 inches minimum beside a secondary burner or sink, with 36 inches being more comfortable when space allows. Verify that lids, doors, and storage drawers do not steal that space when open. If they do, food staging becomes awkward and unsafe.
- Lay out utility runs on the shortest practical path. Gas, electric, and water should route cleanly from the source to the island without crossing high-traffic steps or sharp corners. Verify access for shutoff valves, cleanouts, and junction boxes. If the only route requires cutting across finished stone twice, expect higher cost and a more complex installation.
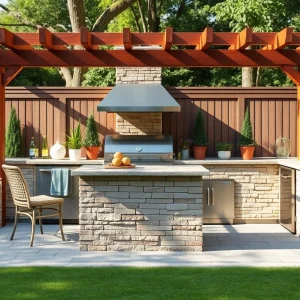
- Set the island height and overhang early. Standard counter height is often around 36 inches, but seating overhangs, appliance doors, and vent openings may need adjustment. Verify stool knee clearance if you want bar seating, and check that appliance doors can open without hitting a seat pedestal or wall. If the overhang is too deep without support, you will need structural brackets or posts.
- Plan ventilation and heat escape for enclosed appliances. Built-in grills and refrigerators need airflow; “sealed” cabinets trap heat. Verify the vent grilles or openings recommended by the manufacturer, often in square inches rather than a vague “open space.” If the enclosure has no low and high ventilation path, heat buildup shortens equipment life.
- Build in maintenance access, not just day-one appearance. Leave removable panels, accessible fasteners, and enough front clearance to slide equipment out for service. Verify that you can reach the shutoff, cord, and drain trap without demolishing finishes. If repair access requires cutting tile, the layout is not finished correctly.
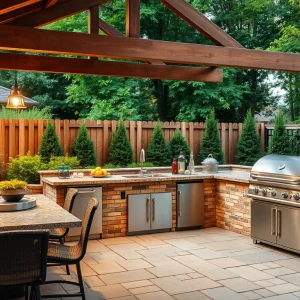
The biggest trap is the “perfect” symmetrical picture. Real outdoor kitchens need room for walking, carrying, opening, and cleaning. A 10-foot island with no working clearance in front of it is worse than a smaller, simpler run that actually functions. If the balance feels off, compare it with our outdoor kitchen dimensions guide before you pour anything.
A useful standard to keep in mind is the International Residential Code for structural and utility work, along with local amendments. For gas work, I would also pay attention to manufacturer instructions and local fuel-gas code rather than treating the countertop plan as the last word. If the appliance manual and the code disagree, the stricter requirement usually wins, and the IRC code page is worth checking before framing starts.
What are the outdoor kitchen design mistakes that cost the most?
The expensive mistakes are the ones that force demolition, not the ones that annoy you for a season. I would rank them this way: utilities in the wrong place, appliance spacing wrong, drainage ignored, and materials chosen for looks instead of exposure.
One common error is putting the grill too close to walls, railings, pergolas, or vinyl siding. That can turn a cook zone into a heat-management problem and may violate clearances. Another is forgetting that wind moves smoke, grease, and flame. A grill under a low roof extension or against a corner can funnel smoke right into the seating area. Ugly, frankly.
Drainage gets ignored until water finds the low point. A flat patio with no slope, or a kitchen island set where runoff pools at the base, causes staining, freeze-thaw damage, and musty cabinet interiors. Plan for positive drainage away from the structure. If the site is already known to hold water, fix that before building cabinetry.
Electrical mistakes are just as costly. Outdoor receptacles, lighting, and appliances need weather-rated parts and correct protection, including ground-fault protection where required by code. A standard indoor outlet in a damp zone is the wrong part. In practical terms, the mistake costs you either a failed inspection or a redo, and NEC GFCI requirements are the kind of detail that can stop a project cold.
Material choice matters more than style boards admit. Not every stone, wood, or cabinet system handles UV, salt air, frost, or summer humidity equally well. If the kitchen sits in a coastal or freeze-thaw climate, “outdoor-rated” should not be a decorative phrase. Ask what the finish does after years of sun, not just what it looks like on day one, and check University of Florida IFAS guidance if your climate is humid or coastal.
The last major cost trap is underestimating storage. A beautiful island with nowhere for utensils, propane accessories, cleaning supplies, or covers becomes cluttered immediately. Skip drawers, access doors, or a dry storage compartment, and you will end up hauling things indoors and back again every meal. For planning help, see our outdoor kitchen storage ideas.
When should you stop and redesign?
Stop and redesign as soon as any of these conditions show up, because the wrong fix later is usually more expensive than the right layout now.
The appliance manual requires clearances you cannot meet: the grill, fridge, or burner will overheat or violate installation instructions — change the appliance or the layout before framing starts.
The only gas or electrical route crosses finished hardscape or structural members: the utility run becomes invasive and costly — reroute before construction, or move the kitchen closer to the service source.
The patio drains toward the house or pools where the kitchen will sit: standing water will damage materials and create slip risk — fix grading or relocate the kitchen to higher ground.
The island leaves less than about 36 inches of workable aisle in front of the cook line: people will collide while carrying hot pans — shrink the appliance count or reorient the run.
The design depends on an overhang, roof, or pergola that has not been structurally verified: the cover may not support itself or may trap heat and smoke — have the structure evaluated and adjust the ceiling height, venting, or span.
The sink, fridge, and grill all land on one tight 8-foot stretch: the kitchen will look complete but function poorly — split the program into a simpler cooking zone and a separate prep or beverage area.
If any of those are true, pause and simplify before concrete, gas lines, and cabinetry lock you in. That is the point where the design-build process matters more than another render.
What people get wrong about materials, ventilation, and weather
People treat an outdoor kitchen like an indoor one with a different backsplash, and that is where the trouble starts. Outside, the build faces UV, rain, dust, heat swings, insects, and sometimes freeze-thaw cycles. Every choice shifts because of that, so consult the appliance manual and a qualified installer before you buy materials that only look right on a mood board.
A metal cabinet that would be fine indoors can corrode quickly outside if it is not rated for exposure. Wood can work in some protected settings, but it needs the right sealing and maintenance schedule. Stucco, stone veneer, tile, and countertop material all need to be selected for the local climate, not just the catalog photo. If you are in a salt-air environment, corrosion resistance matters more than trend color.
Ventilation deserves its own plan. Built-in grills and refrigerators create heat in enclosed boxes. Gas grills especially need air movement and safe combustion space. A “tight” enclosure looks polished and performs badly. I would rather see a slightly more open cabinet base with proper vents than a sealed box that traps heat and shortens equipment life.
Covering the kitchen also needs thought. A roof protects from rain, but it can trap smoke if the opening is too low or too enclosed. A pergola can cast useful shade, but it does not stop wind-driven rain. If the cover is decorative, treat it as decorative. If it is structural, get the structure right before finishes go in. If you need a reference point, the National Fire Protection Association and local code office are better guides than a Pinterest image.
The trade-off is blunt: the more weather protection you want, the more the design has to account for heat, smoke, and airflow. No free lunch. The wrong move is choosing the most enclosed option just because it looks expensive.
What should the site and utilities be checked for before the pour?
The site and utilities should be checked for grade, load, fuel source, power capacity, shutoff access, and serviceability before concrete or masonry is poured. Once the base is set, changes get expensive fast.
I would confirm whether the slab or patio can carry the weight of masonry, stone, and equipment. A heavy kitchen on a marginal deck or thin patio is a structural problem, not a finish problem. Then I would verify utility capacity: does the existing gas line have enough supply for the grill plus any burners, or is a larger line needed? Does the electrical panel have room for new circuits, especially if you are adding refrigeration, lighting, and a sink area?
Water and drainage are the other two checks that get skipped. A sink without a practical drain path is a bad idea. So is a hose connection that requires running through the house every time you clean. If the site cannot support plumbing easily, I would consider skipping the sink and building around a prep sink indoors instead of forcing a compromised outdoor version.
Finally, think about maintenance access from the start. Can someone reach the back of the refrigerator? Can a plumber shut off water without removing stone? Can an electrician service the GFCI-protected outlet without disassembling the cabinet face? If the answer is no, the site is not truly ready.
A good rule of thumb is this: if the utility plan requires guessing, stop and get it drawn properly. A tidy concept sketch is not enough when gas, electricity, and water all share one small footprint. For a final pass, compare your plan with our outdoor kitchen checklist.
FAQ
Do I need a sink in an outdoor kitchen?
No. A sink is useful, but it is not mandatory.